
How to use our product.
Create an account and login to access all of the 3D models and begin training and learning human anatomy and physiology with annotations and definitions. You will be able to draw onto the models, type detailed text, record the screen and audio, and create custom presentations, train HCP’s and educate patients in real time. Custom branding and embedding is available on our Annual Enterprise Plan.
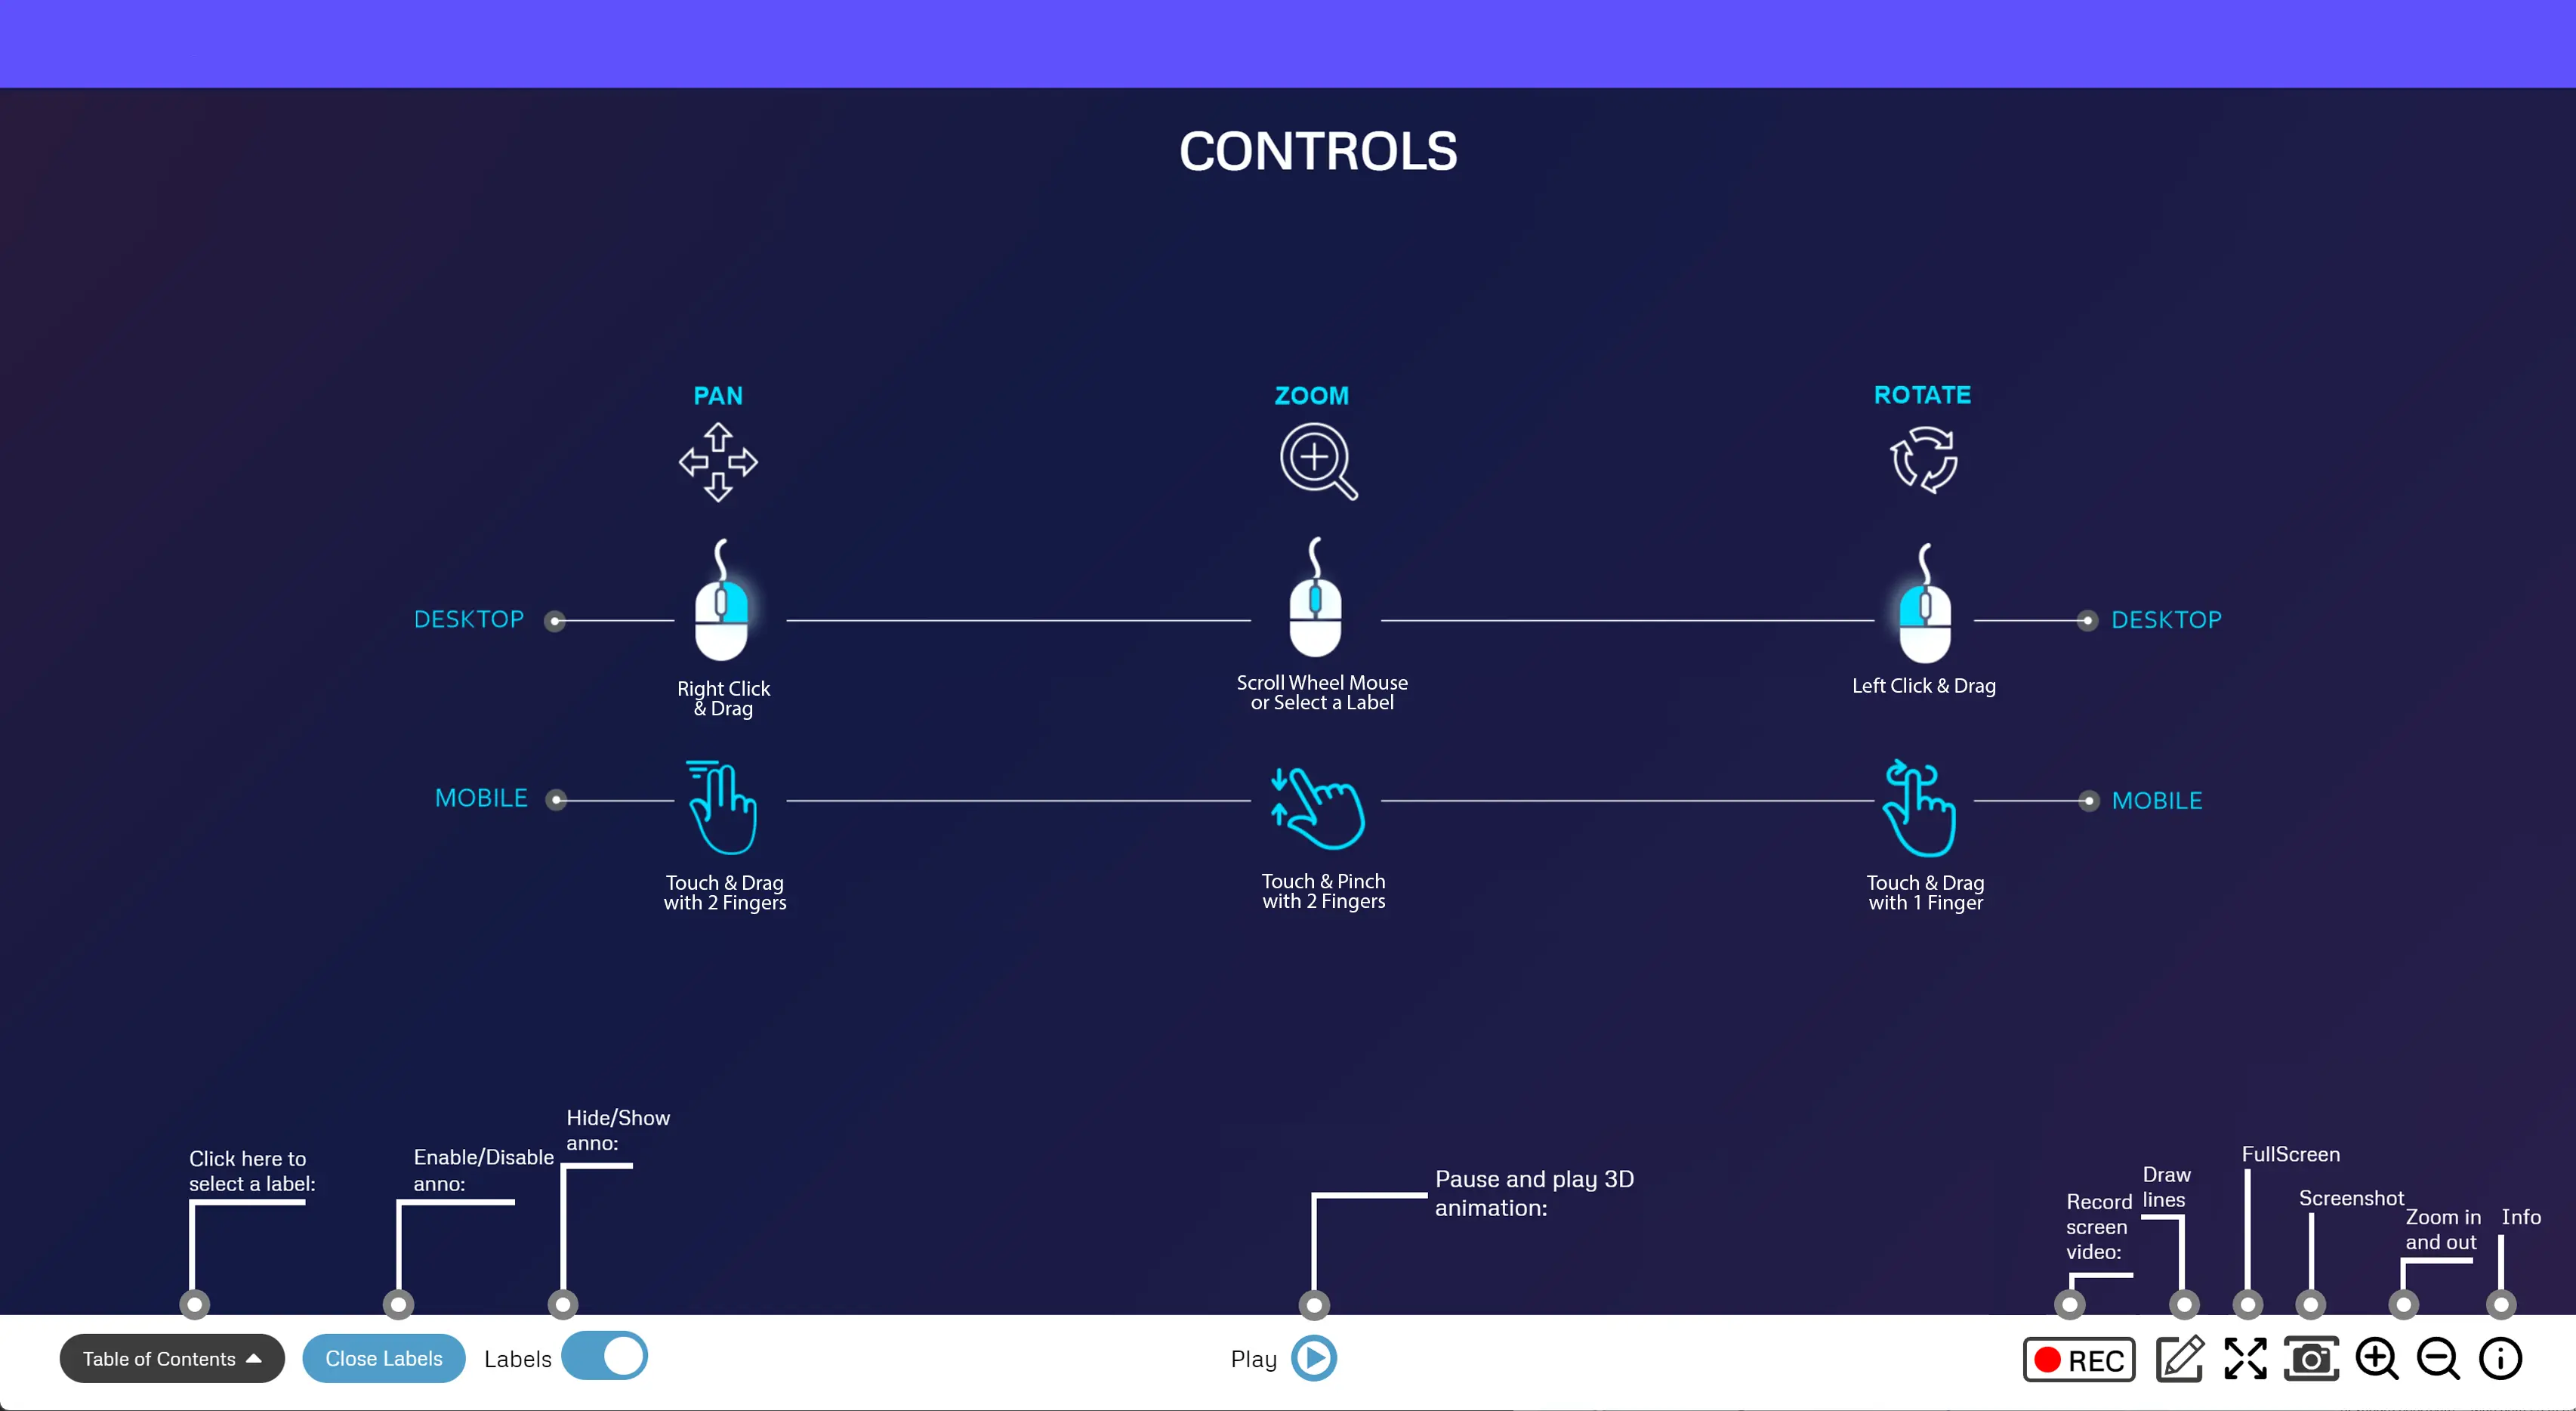
CONTROLS
info:
Click this button on the far right of the screen for more info on how to use this interface.
Draw feature:
Push the play button to see or pause the animation. Not all 3d models have animation.
Play Animation:
Play Animation: Click this button to play the animation.
Layers:
Some 3D models have layers. Select the plus or minus sign to see additional parts of these 3Dmodels.
Table of Contents:
This menu shows a list of all anatomical annotated structures and layers shown in the 3D model.
Close Labels:
This button will close all open labels.
Labels:
This button will hide or show all labels.
Video Screen Record:
Push the record button to create a custom screen recording of your models. This even records the drawing feature.
Image Screen Shot:
Capture an image of the screen.
Zoom feature:
Zoom in and out with these buttons or your wheel mouse.
How to Cancel your Subscription:
To cancel a subscription you need to login to your account portal you created and cancel the subscription by using following steps:
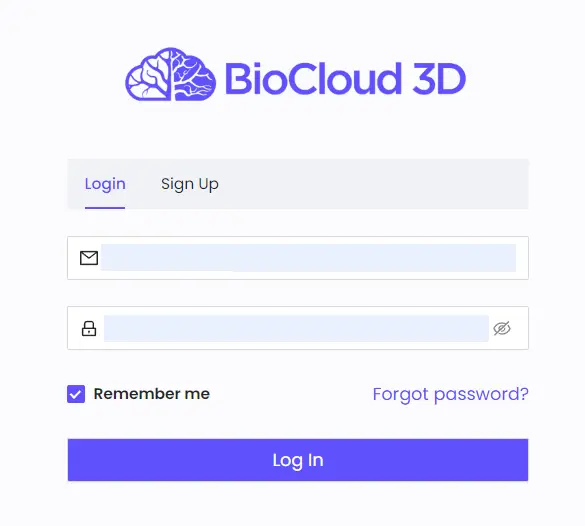
1. Login to your account
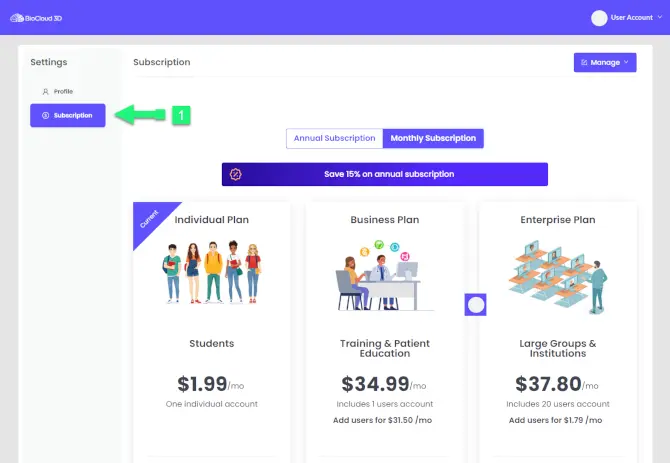
2. Go to Settings and then to the Subscription tab on the left.
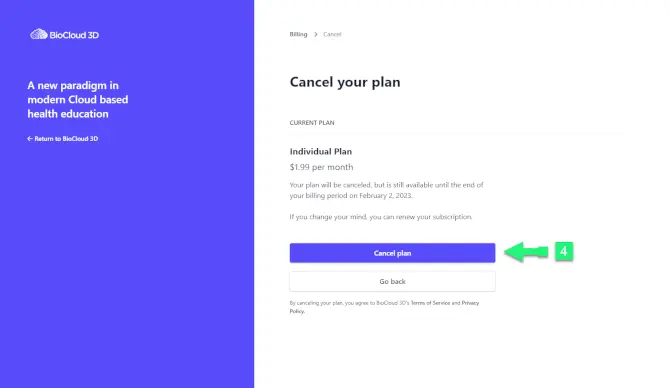
3. Click on the Manage drop-down menu and then click Cancel Plan
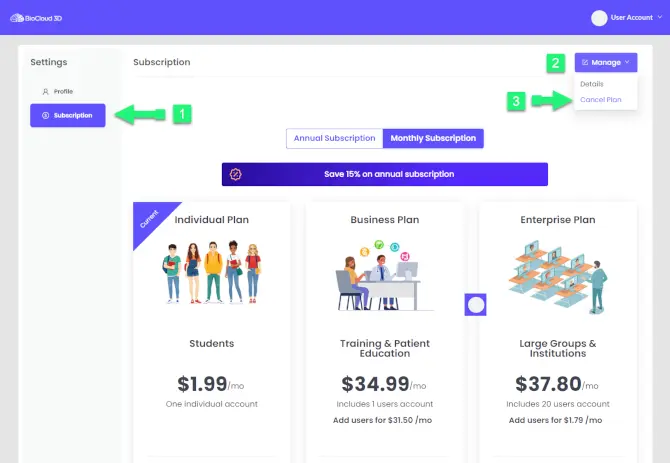
4. Now the stripe payment customer portal will open. Click on the Cancel plan button.
If you have any trouble we would be happy to help. Email us at support@biocloud 3d.com.
Please feel free to send us feedback about your experience anytime on www.Biocloud3d.com.
Record a video or take a photo on mobile devices
Due to the security restrictions certain features on mobile devices are locked. In order to create a screenshot or screen rendered video you need to launch it on your device.
Take a Screenshot on an iOS device by holding down these buttons
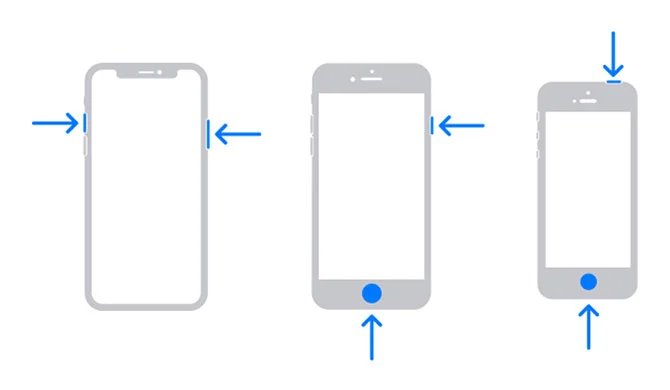
It’s easy to take a screenshot using the hardware buttons on your iPhone, but the exact button combination that you need to press varies by iPhone model.
Here’s what you press based on iPhone model:
- iPhones without a Home button: Briefly press and hold the Side button (on the right) and Volume Up button (on the left) at the same time. These phones come equipped with Face ID and include the iPhone 11, iPhone XR, iPhone 12, and newer.
- iPhones with a Home and a Side button: Briefly press and hold the Home and Side buttons at the same time. This method works on phones with a Touch ID sensor such as the iPhone SE and older.
- iPhones with a Home and a Top button: Briefly press and hold the Home and Top buttons at the same time.
Capture Video
If you want to capture video of your iPhone or iPad screen, you don't even need to download an app to complete the task. The ability to record activity on your screen is built right into iOS and iPadOS through a feature called Screen Recording.
Here's how to set up and use the built-in Screen Recording tool.
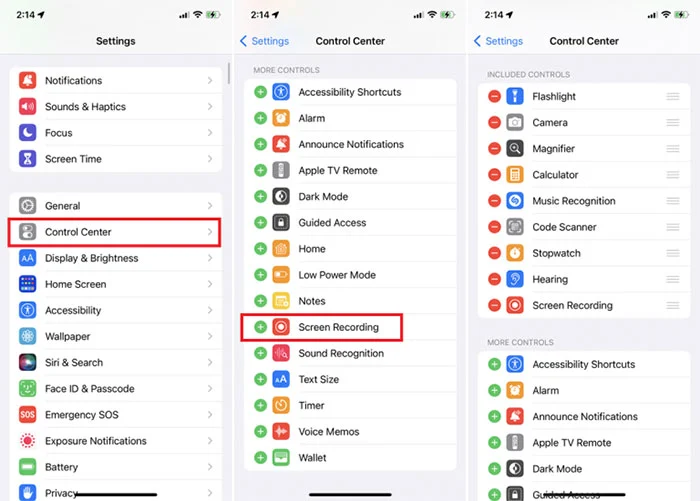
01: Before you can use the Screen Recording feature, you must first add it to the Control Panel. On your iPhone or iPad, go to Settings > Control Center and make sure the option Access Within Apps is turned on. Under the More Controls section, tap Screen Recording to add it to the Included Controls section, which appears in the Control Center. Proprietary
02: Now move to the screen you want recorded. Swipe to open the Control Center and tap the circular Screen Recording button. You will then see a countdown, after which the recording will begin.
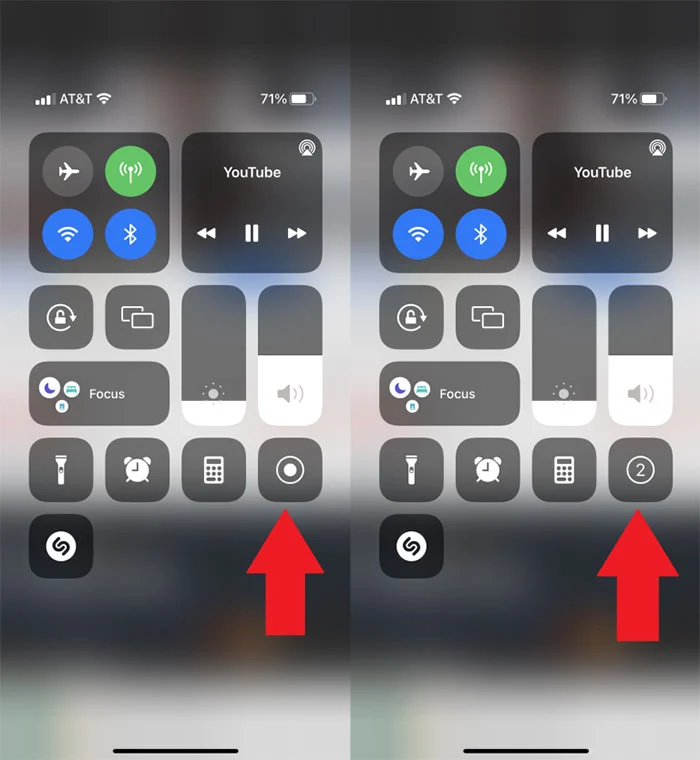
03: When you're done with your video, there's no need to return to the Control Center. Tap the red icon at the top of the screen and tap Stop when asked if you want to stop the screen recording. A notification will appear to say the recorded video was saved to the device.
Recording your screen on an Android 12 device
It's fairly easy to record your screen on an Android 12 device. After teasing the option before Android 11's launch, Google's developers have designed a built-in screen recorder for Android versions 11 and higher. Here's how to use the feature.
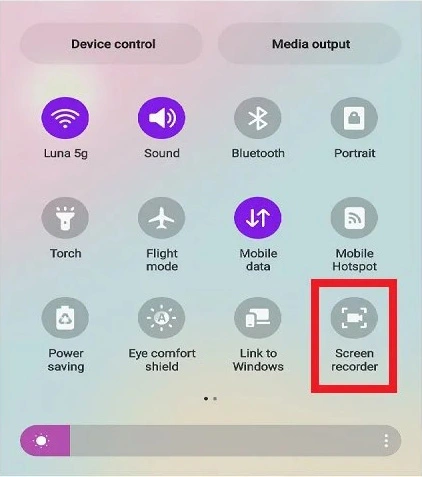
Step 1: Pull down your phone's Quick settings panel by swiping down the Notification panel twice.
Step 2: Select the Screen recorder option.
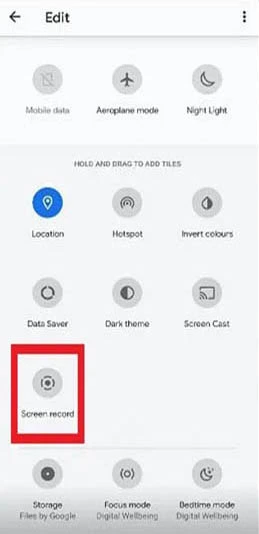
Step 3: If you don't see the Screen Recorder option, click on the Plus symbol that appears at the end of all the icons.

Step 4: Now select the Screen recorder option, drag it down, and place it among the other icons in the Quick Settings menu.
Step 5: Once you click on the Screen Recorder option, you will be asked whether you also want to record audio and show touches on the screen.
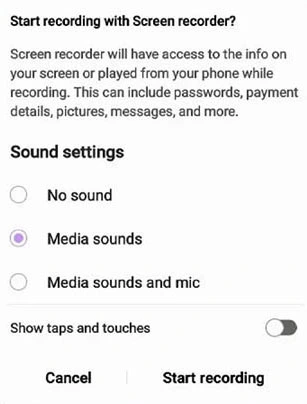
Step 6: Make your desired choices, and then select Start recording to begin recording your screen.
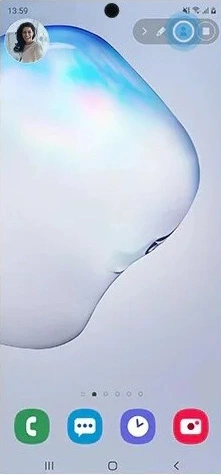
Step 7: A red recording icon or notification will appear at the top of your screen while your phone is recording. You can click on the Tap here to stop recording whenever you're done capturing your screen.

Recording your screen on an Android 10 device
While the process to record your screen on Android 12 and 11 is the same, Android 10 has a similar method you can try. For instance, Samsung and LG phones on Android 10 have a similar Screen Record tool in the Quick Settings panel. Here's how to use it.
Step 1: Open your Quick settings panel by swiping down on your screen.
Step 2: Scroll down to find the Screen record option. If you don't see it, follow the same steps as the section above. Find the Edit or Plus icon, find the Screen record option, and drag it into the Quick Settings panel.
Step 3: Press Start, wait for the countdown, and your phone will begin recording the screen.
Step 4: Samsung also lets you add your own video to your footage. Just select the Front camera icon (it looks like a person’s silhouette).
Step 5: If you’re recording on a Galaxy Note phone, you’ll also be able to use the S Pen to draw on the recording. Just select the Pencil icon at the top.
Step 6: You can try this technique with most phones supporting the screen-recording function.
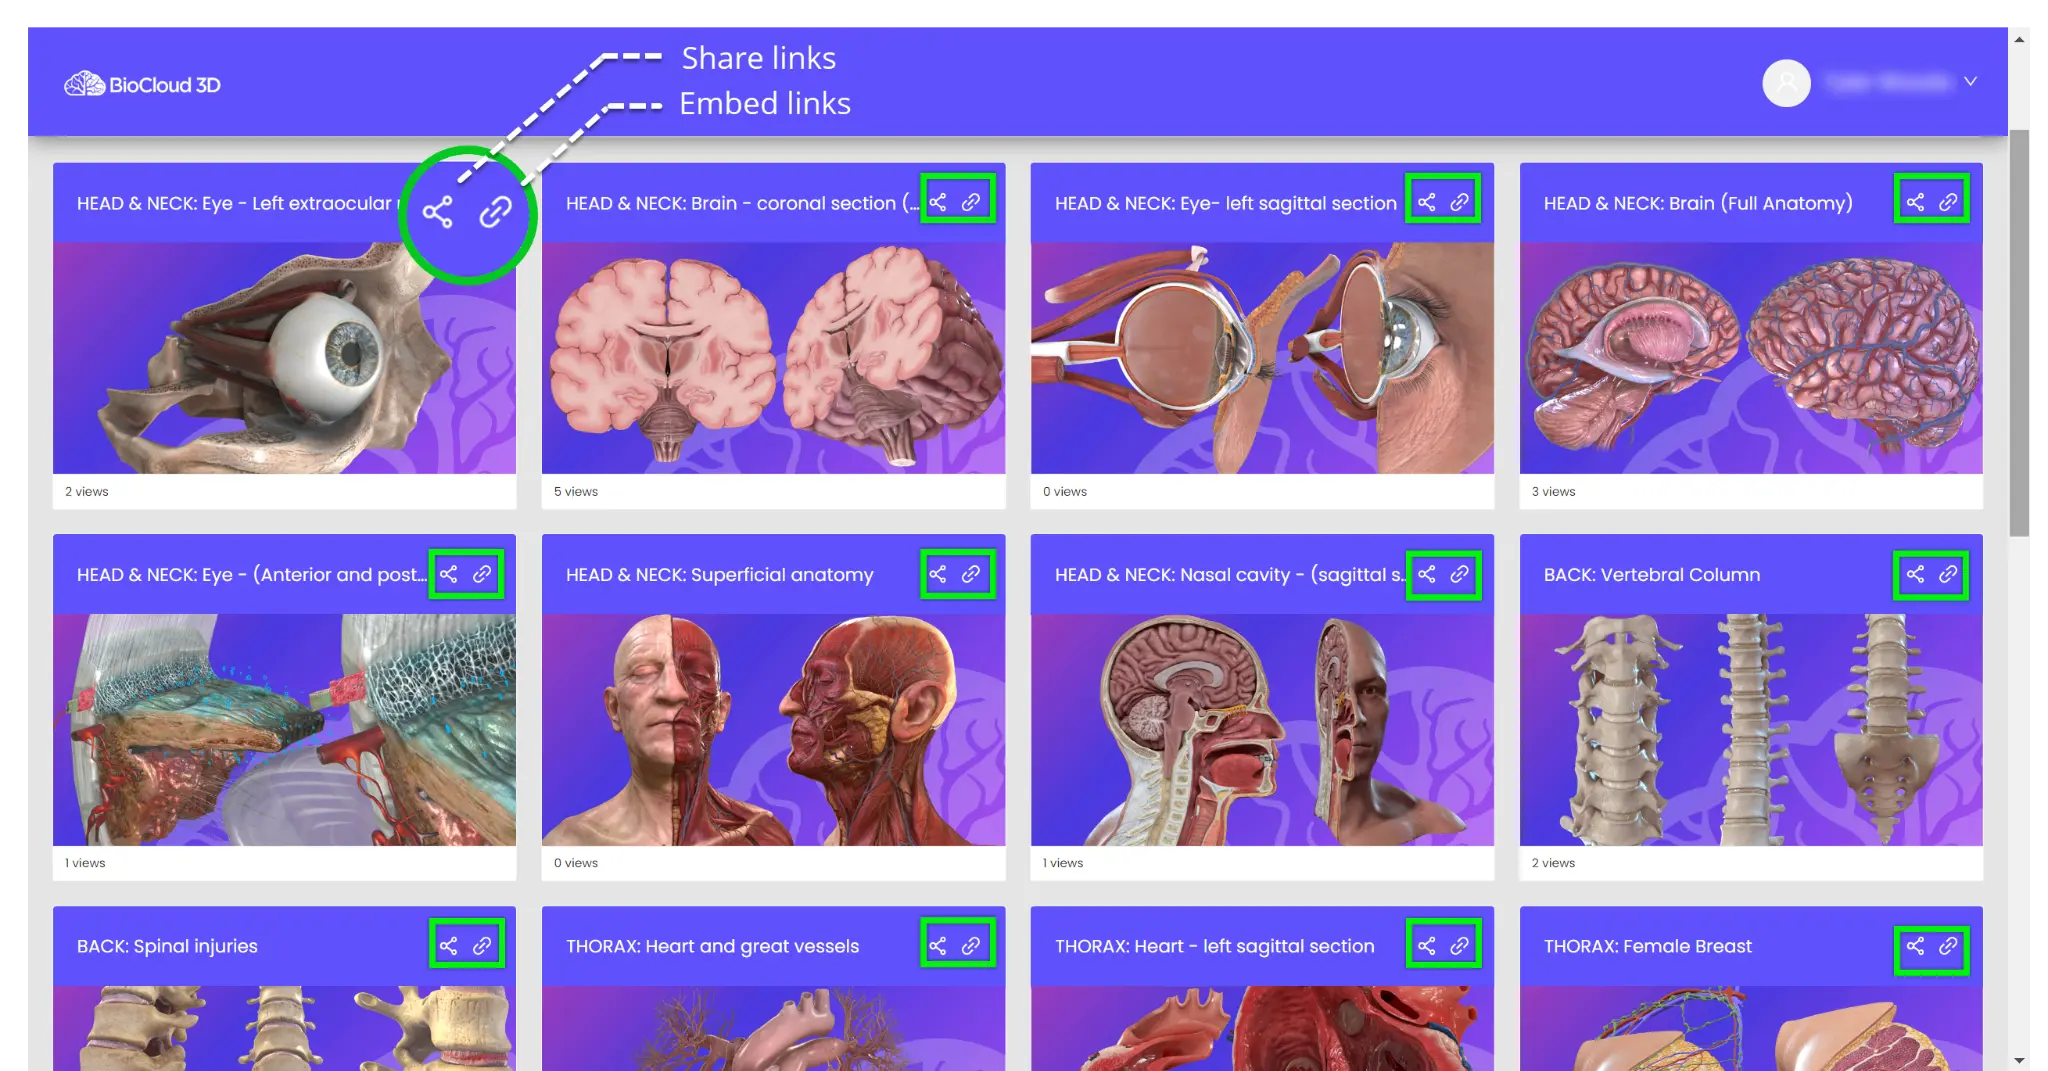
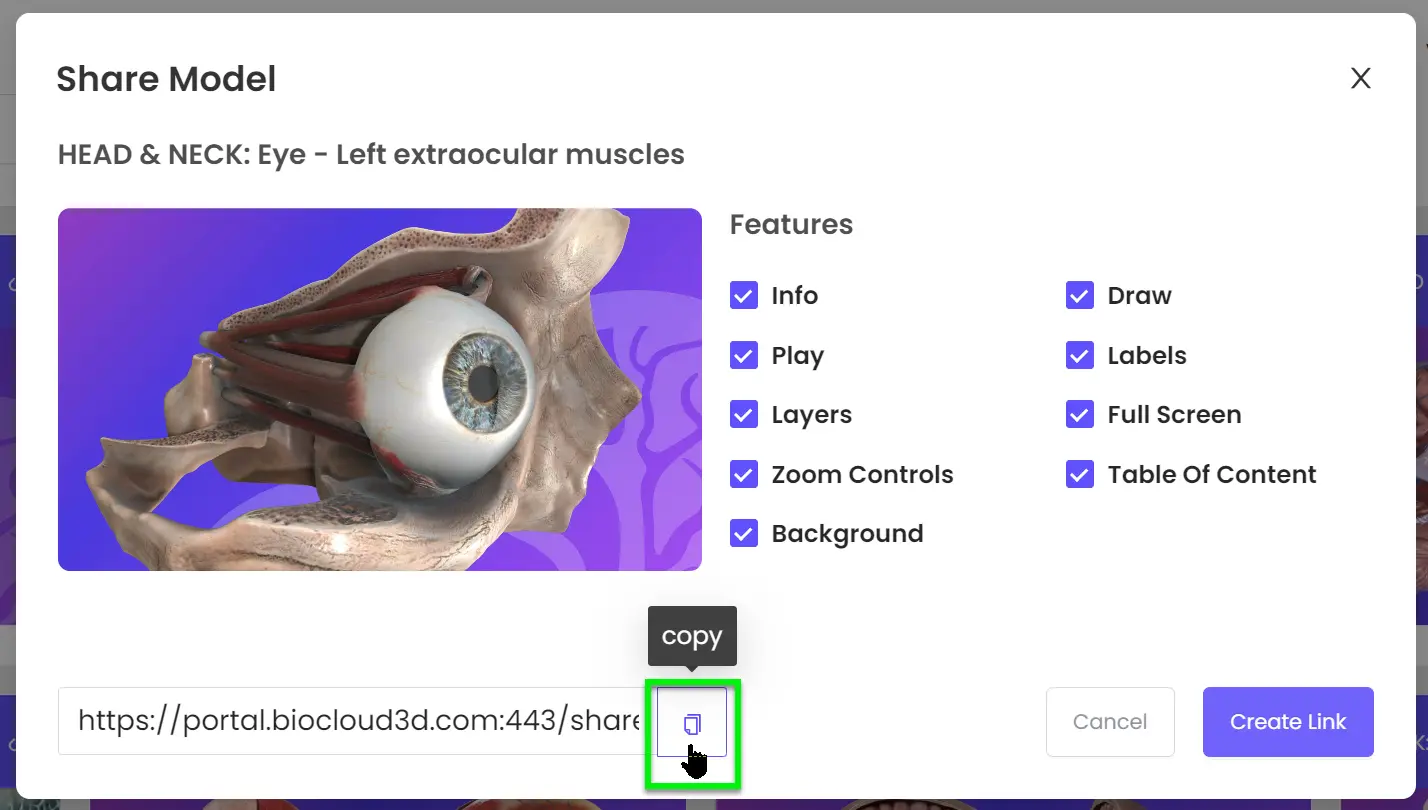
How to Embed or Share BioCloud 3D models:
1. Login to your account

2. Go to the 3D Model Library and Select either the Share or Embed links in the top right corner of each model.
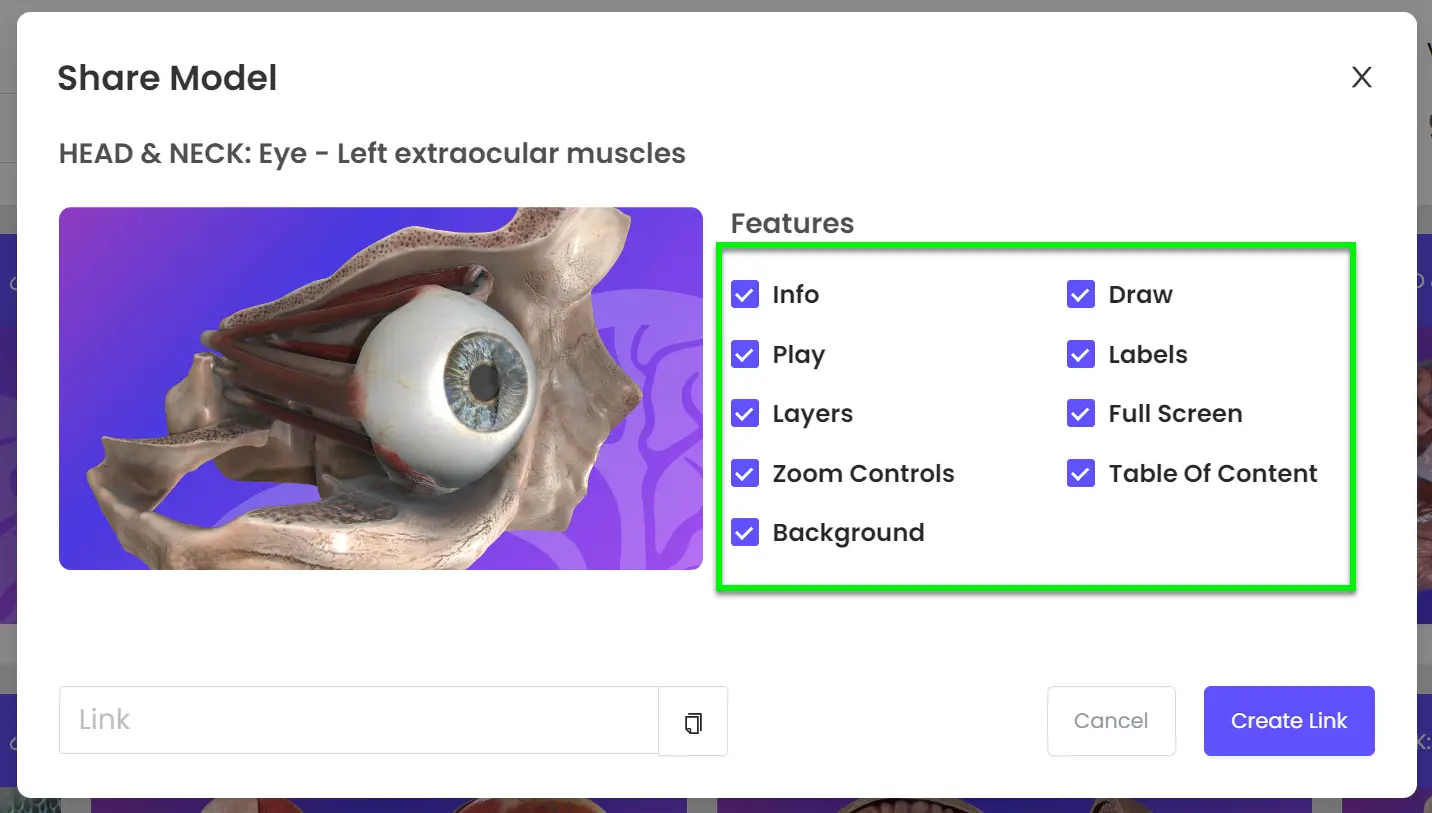
3. If you select the Share link button a pop-up window appears.
4. Select or deselect the check mark area to enable or remove the desired features.
5. Click the Create Link button and this will generate a custom link.
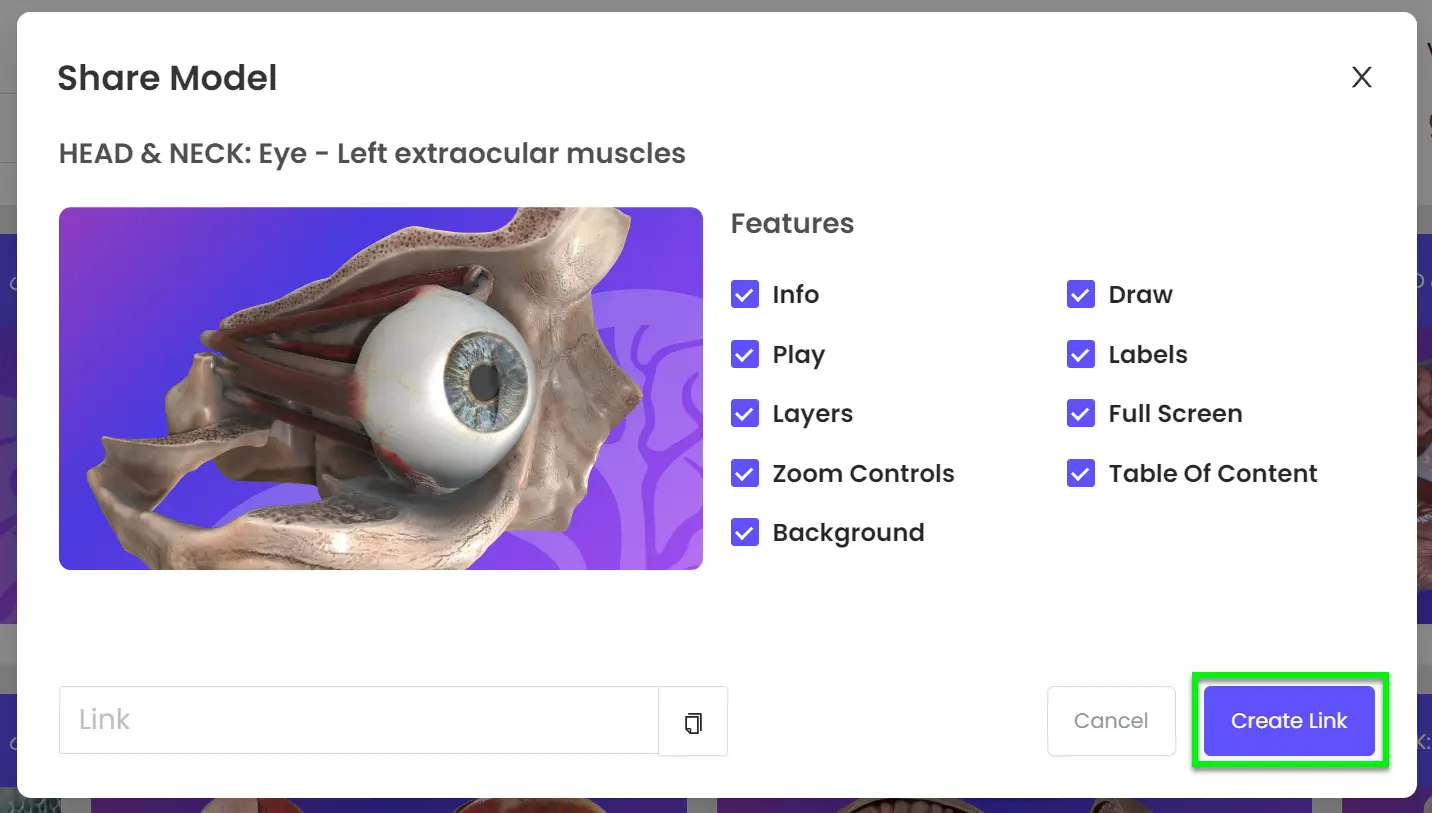
6. Copy the link. Then this link can be shared.
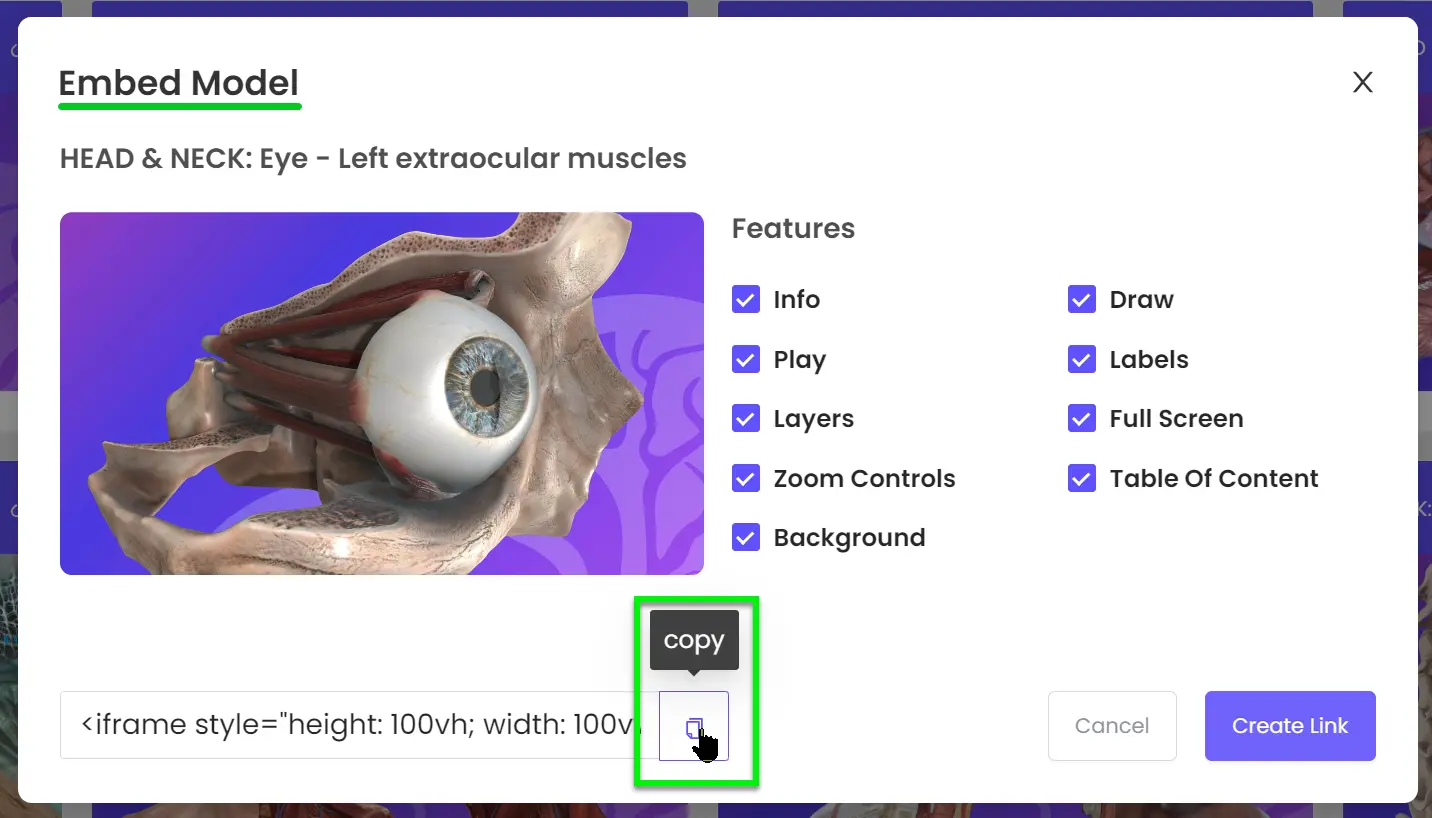
7. If you Select the Embed link button this window will appear.
8. This functions in the same way as the sharing feature, but you will need to paste this code directly into your Website using HTML. Please consult with your internal Web developer for help with using these embed features.
If you have any trouble we would be happy to help. Email us at support@biocloud 3d.com.
Please feel free to send us feedback about your experience anytime on www.Biocloud3d.com.
How to Set up a Custom Portal Domain:
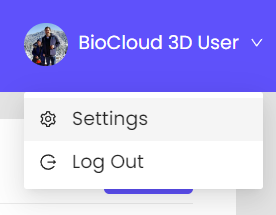
1. Login to your Enterprise account and open your account settings.
2. Select Branding and add your domain name.
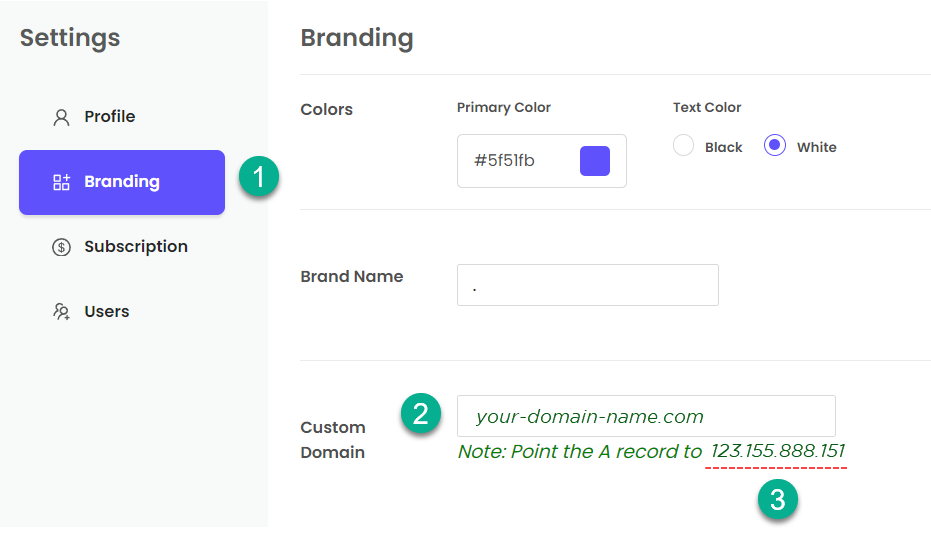
3. Copy your personalized “A” record number.
Note: You will need to add an DNS “A” record to your Domain host where you purchased your domain name. Point this record to the number copied above.
4. Each domain host is different. Please contact your domain host if you need further instructions.
If you have any trouble we would be happy to help. Email us at support@biocloud3d.com.
Please feel free to send us feedback about your experience anytime on www.Biocloud3d.com.